
3D mapping is another form of mapping where it uses technology to aid in profiling buildings, land, or any object in 3 dimensions for multiple usage. For normal mapping data is captured in 2D view. The 2D view shows a map of data in a plane, however this plane data still allows users to extract the height of the feature in a mapping area. What is different between 3D mapping and 2D mapping is that 3D mapping normally being used in the construction sector, users can view the data in many perspectives and then visualize it to gather information that they need. 3D data also allows users to identify any possible obstructions that may occur during construction.
3D Mapping
2D Mapping
3D Mapping Procedure
Pre-Planning
Determine mapping areas that require surveys and identify any potential problem that may occur. This was to ensure that data that is being captured does not have any problem and all the target area can be cover without any blocking.
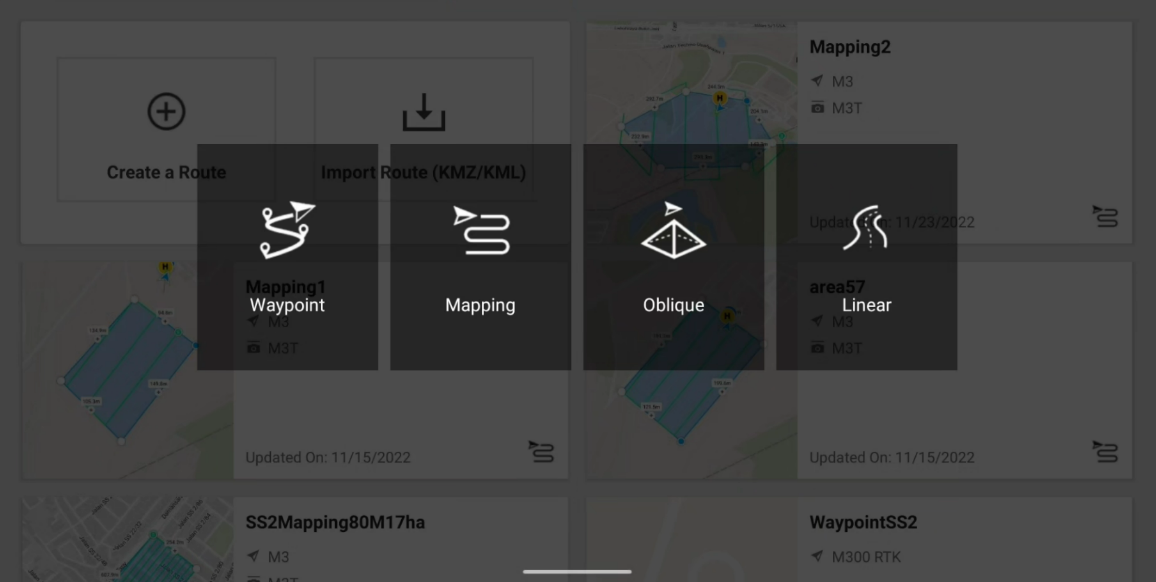
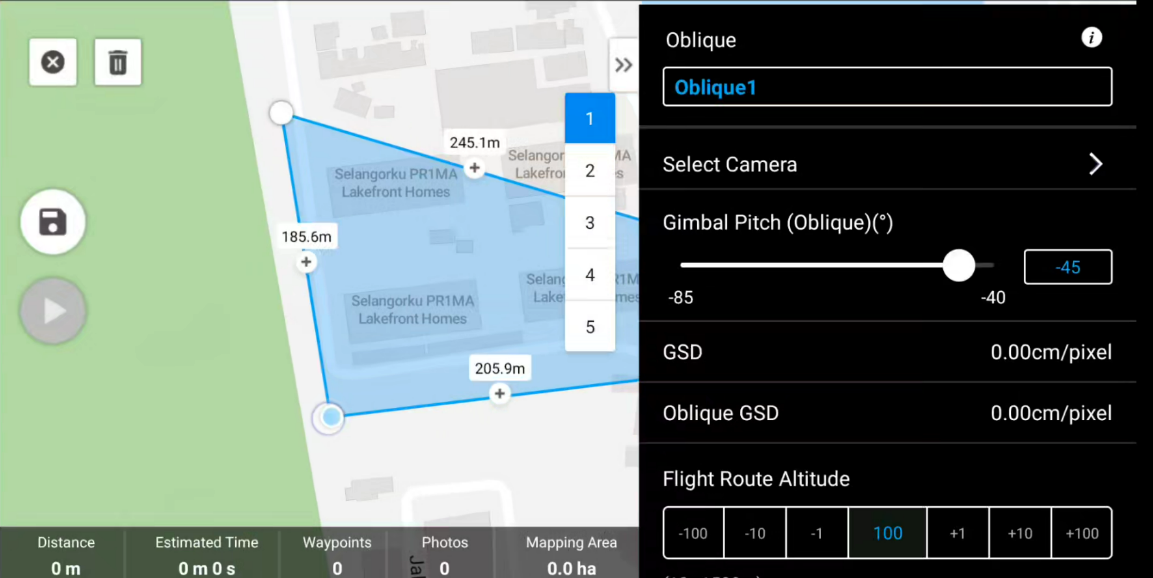
Open DJI Pilot apps and select Oblique Mission. After that navigate to the survey area location and then draw a polygon covering the target area or can import KML from Google Earth.
Mapping Setting
Payload Setting
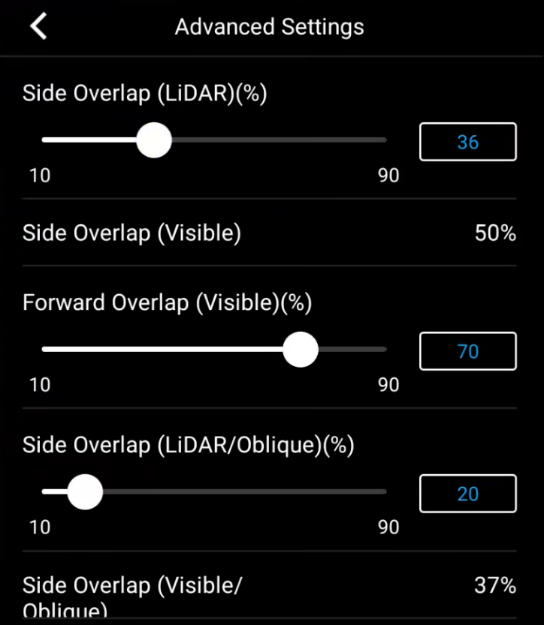
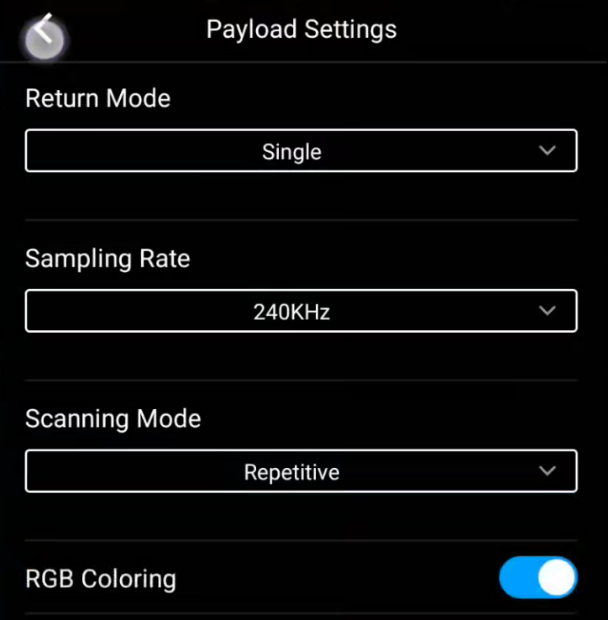
Setting up based on the suitability of the mapping area. For example, overlap percentage and drone speed. For overlap percentage, the higher it set means more photos will be taken but will cause longer mapping time. As for drone speed, the higher the speed being set, the timing of completing mapping will be shorter, but it can cause an image blurry because the speed is too fast for the camera shutter to capture. For a LiDAR camera users need to set the LiDAR Payload setting that is suitable to be used, for example if the mapping being done on an urban area recommend setting to be set is Return mood Single/Triple and Scanning Mode Repetitive. For a Rural area that has tree surroundings, the setting that is recommended is Return mode set to Triple and Scanning Mode is non-Repetitive. Tick on RGB Colouring
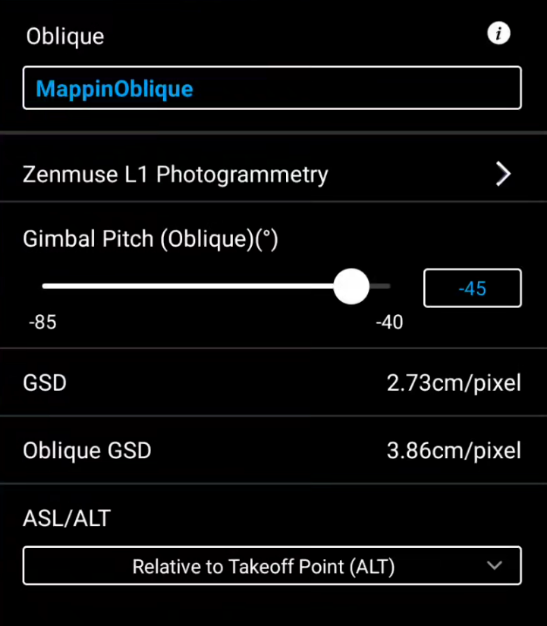
After the settings have been set, DJI Pilot apps will calculate estimated GSD value, distance drone will travel to complete the whole area, estimate time to complete, how many photos will be taken and mapping area size. For a normal mapping photo that be taken is only one time and that is camera will tilt directly below, but for a oblique mission there will be 5 mapping will be done, the first is the normal mapping camera tilt directly down, second until fifth the camera will tilt 45° and the mapping will be done from left, right, forward and back. For a second until fifth mapping, the camera tilt will be facing the direction of the target subject. After everything has been set, do a final checking with the setting and save the setting by pressing the Floppy disk icon on the left on the screen.
Data Collection
Execute Flight Mission
Pre-Flight Check
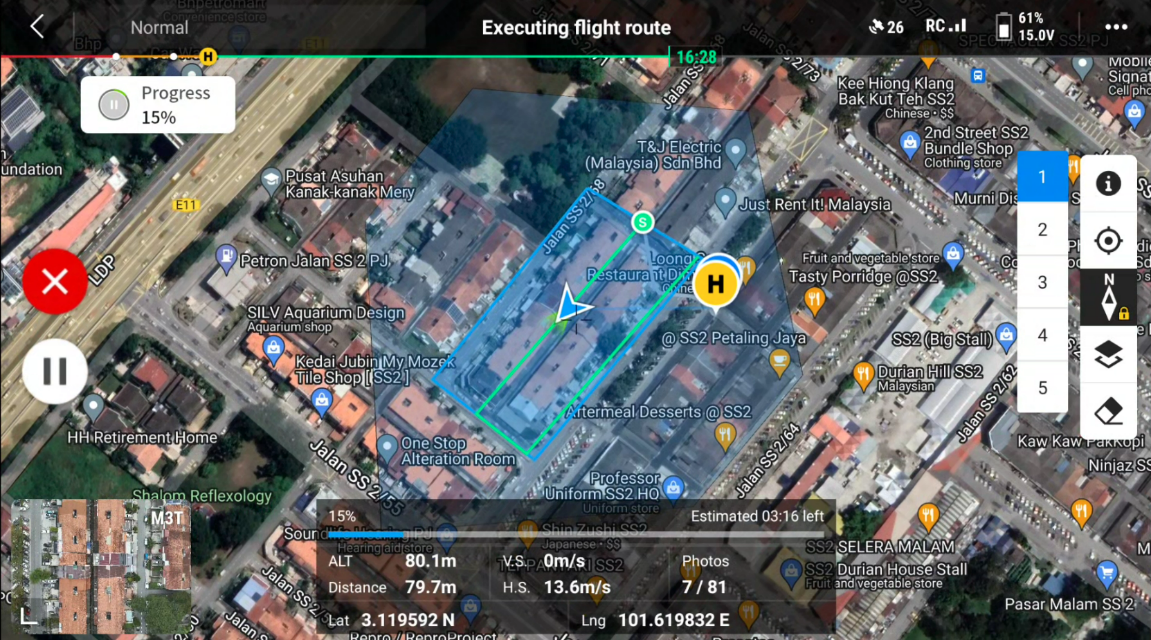
Mapping Progress
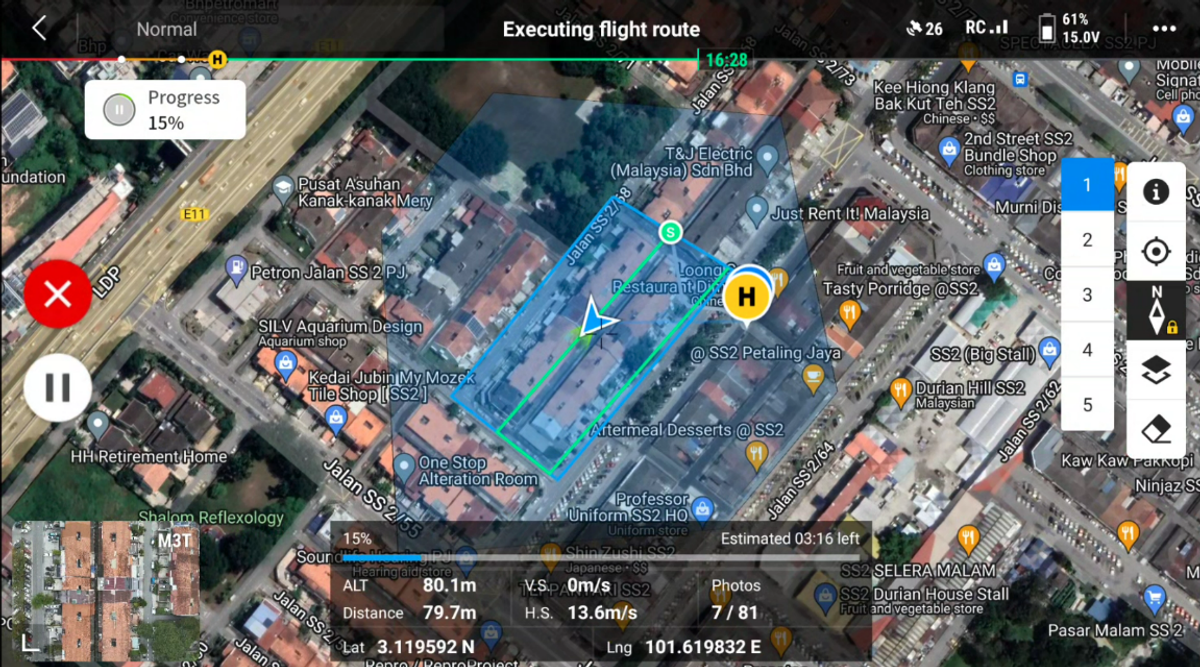
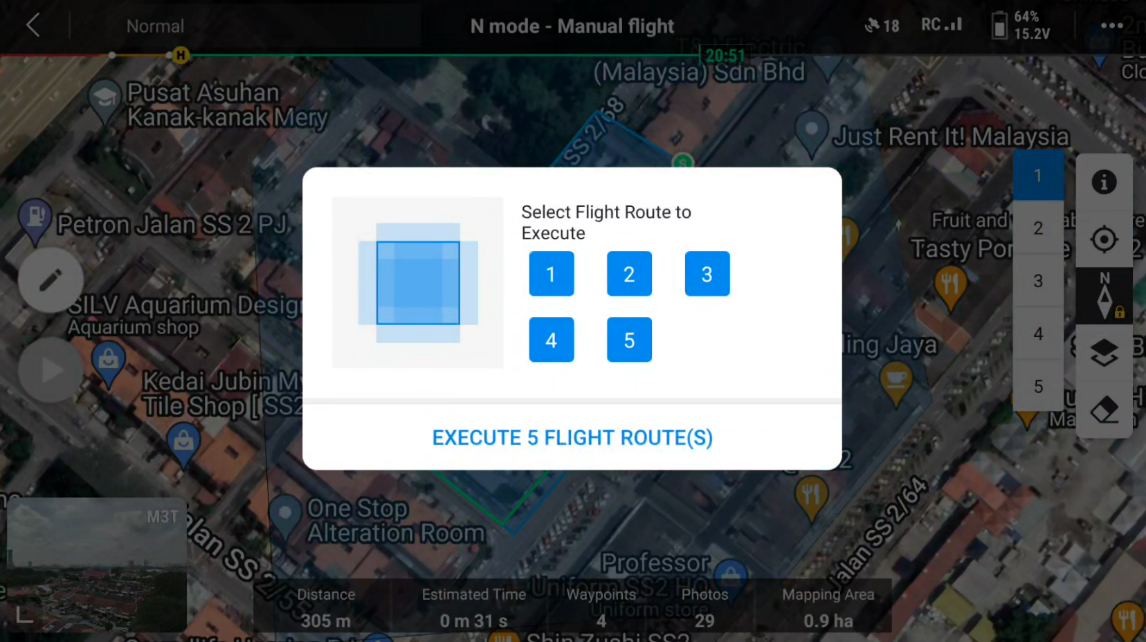
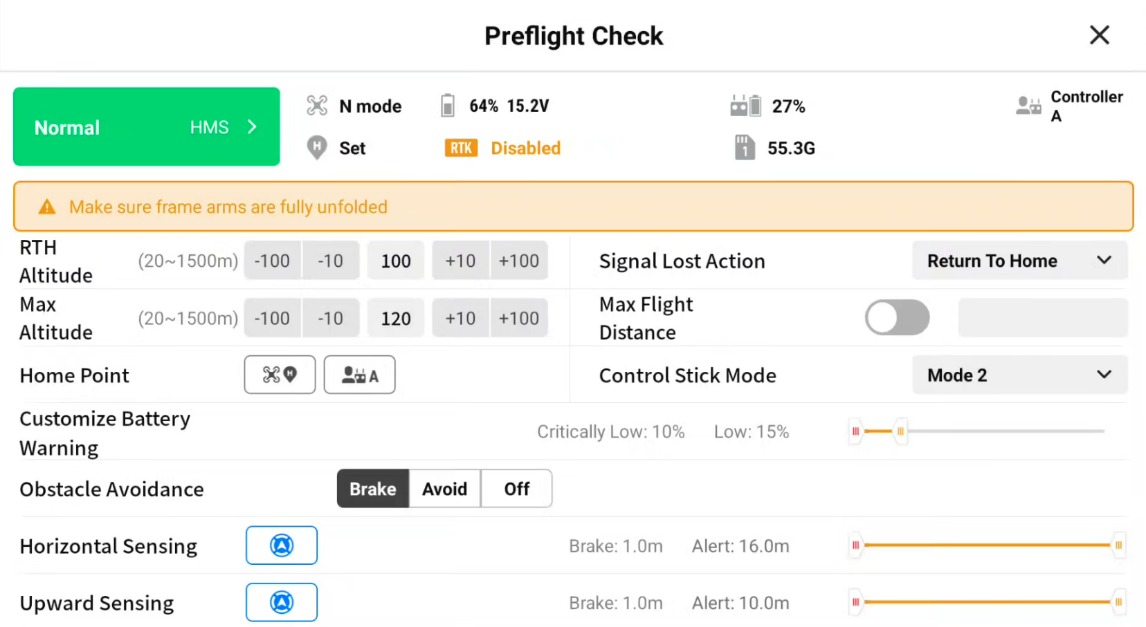
To start oblique mapping, firstly, place the drone in an open space and safe area, press the play button on the left of the screen, then a window will show to confirm the flight route, make sure to tick all 5 routes then click Execute. Then, a pre-flight checklist will show up, double check all the settings and once confirm click Next, upload Flight Mission and lastly to initiate the mapping by click Start. In a time of mapping, the pilot can check all the details about the drone including percentage flight mission complete, battery life, altitude, and distance. Drone will start mapping on the first route after completing the first route it will automatically switch to route second until fifth.
Data Processing
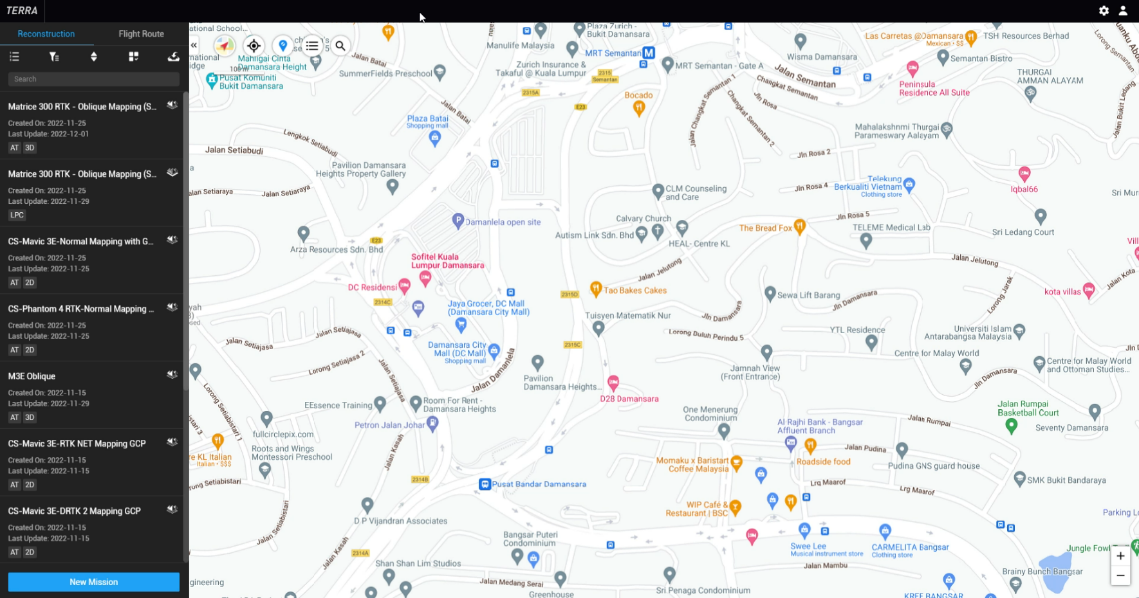
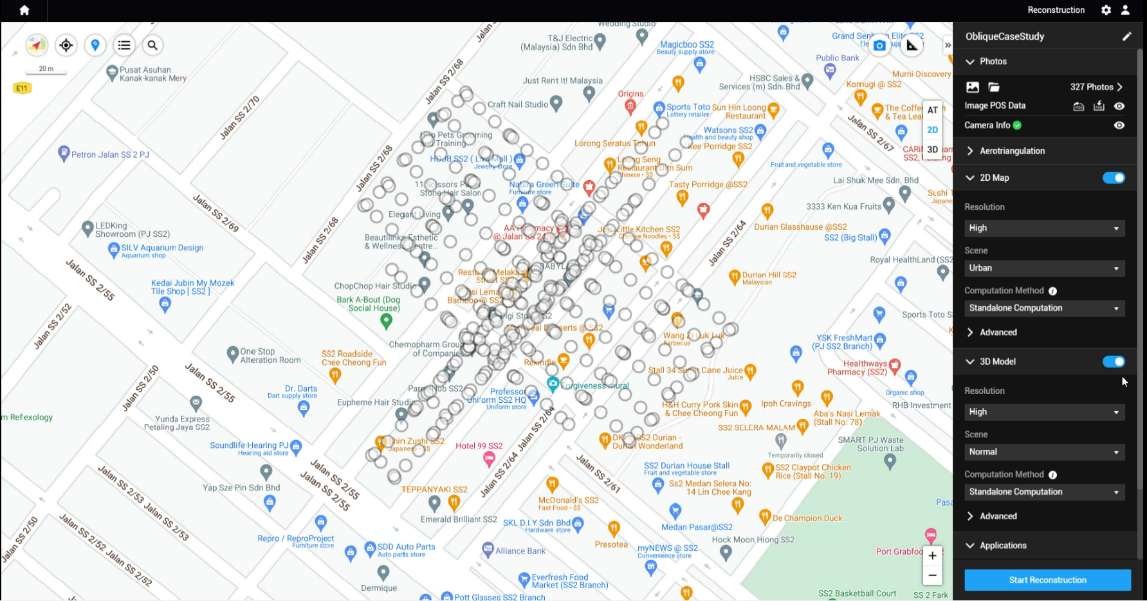
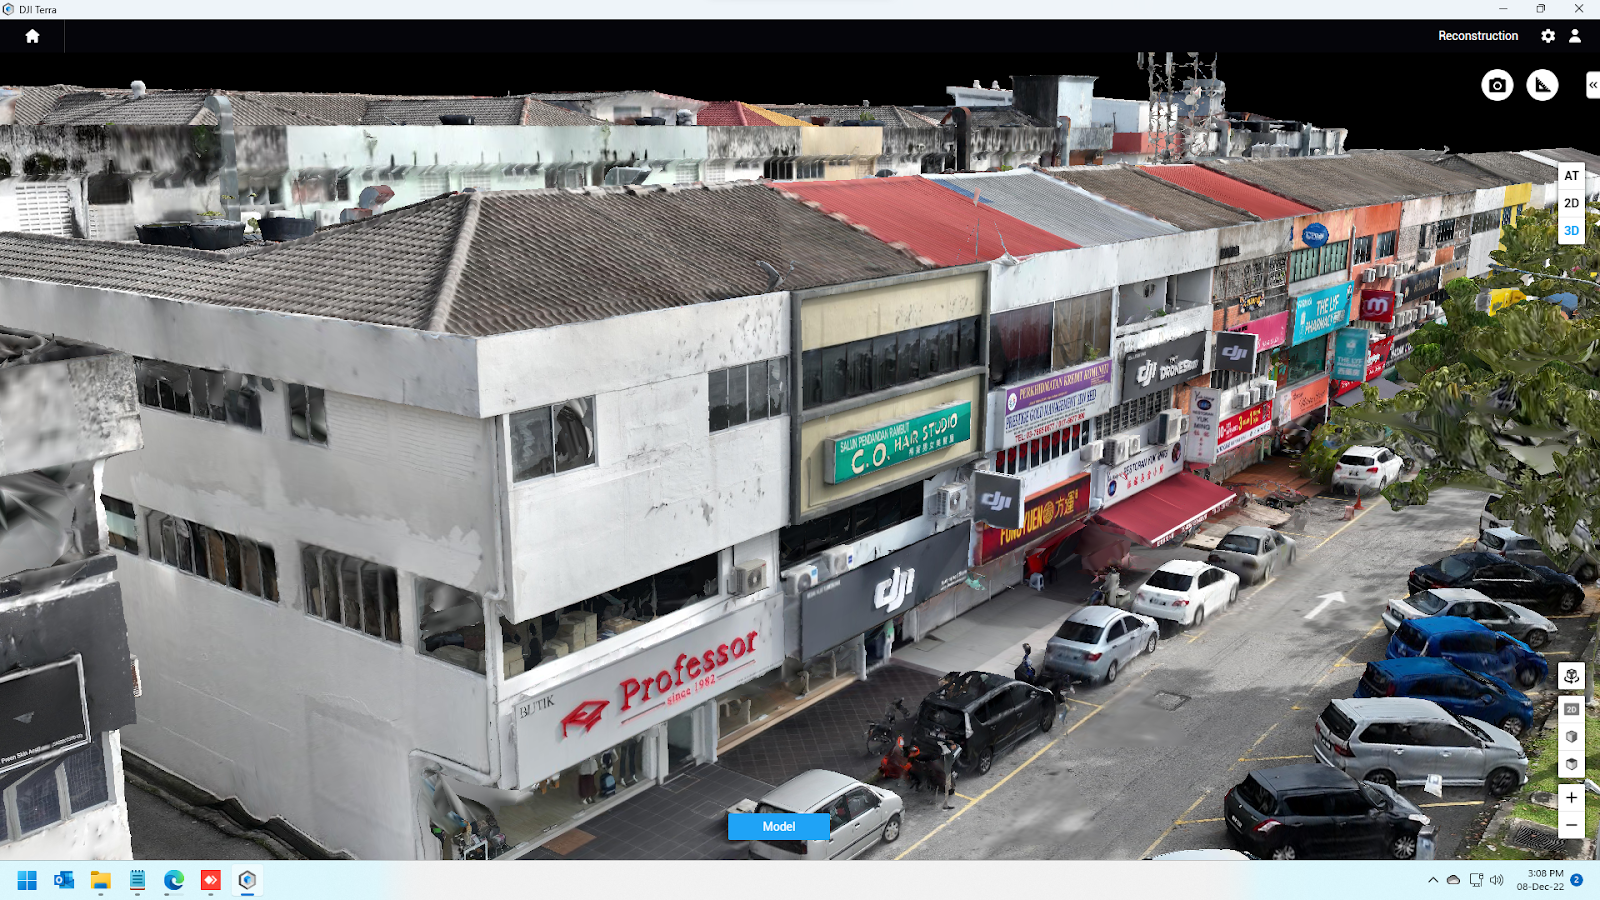
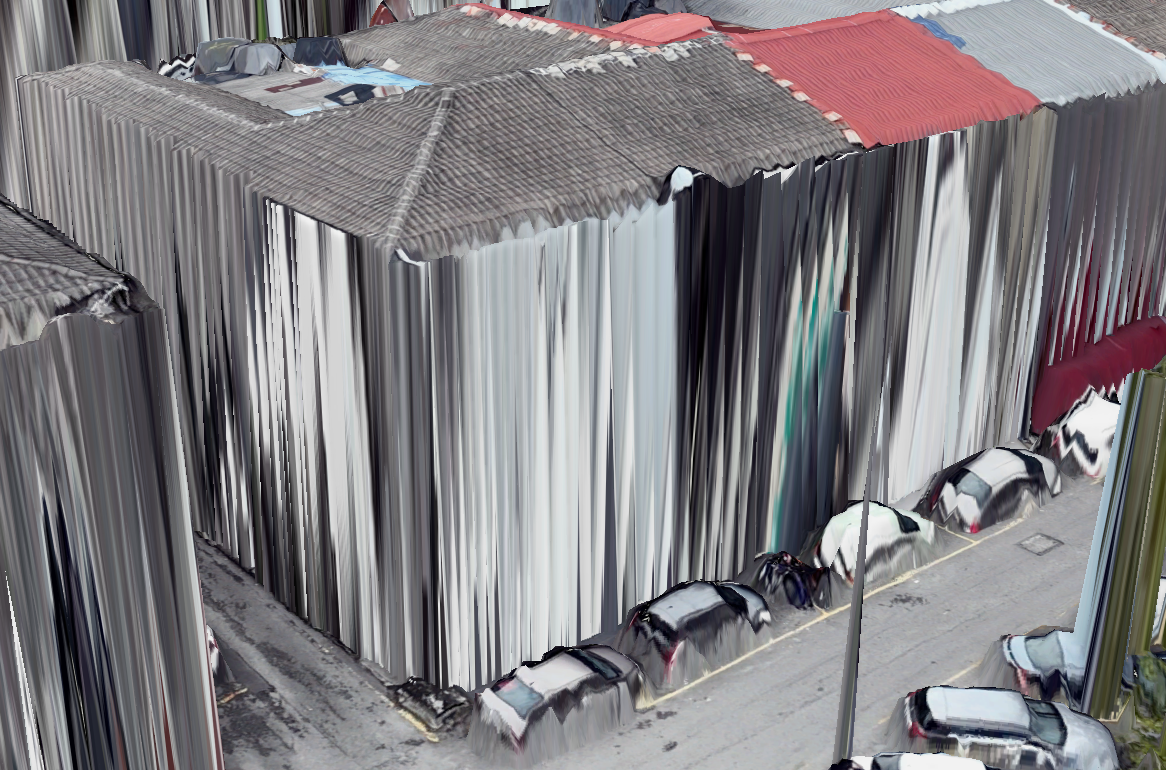
For this processing part, software that will be used is DJI Terra. Import all the photos and data into DJI Terra software and then check all the settings for the processing including Aero triangulation, 2D Map, 3D Map. Lastly click on Start Reconstruction. Processing time will depend on users Computer Spec, Setting that being used and also how much data that is being imported.
Data Analysis
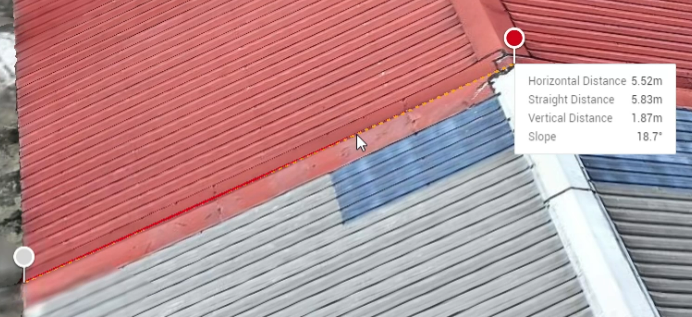
Length Measurement
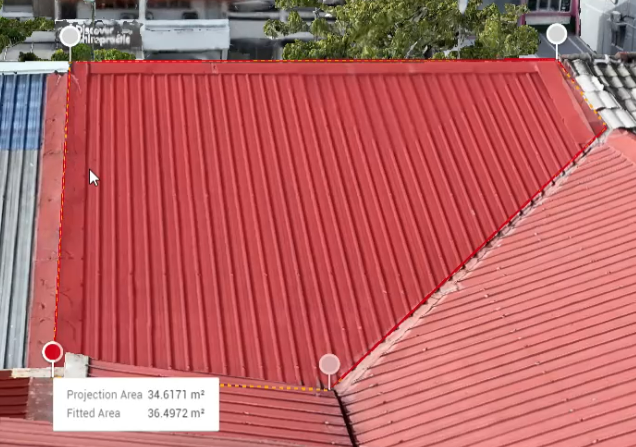
Area Measurement
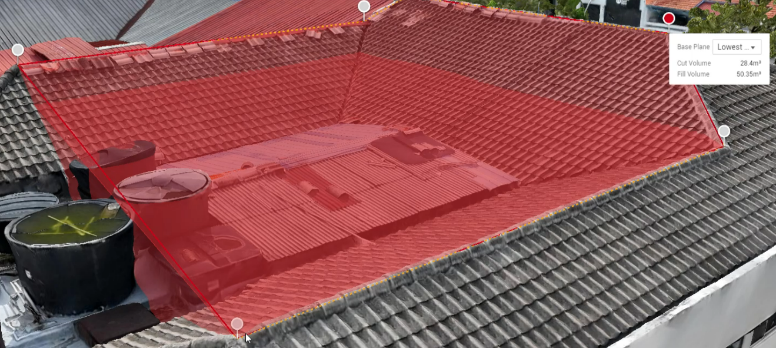
Volume Measurement
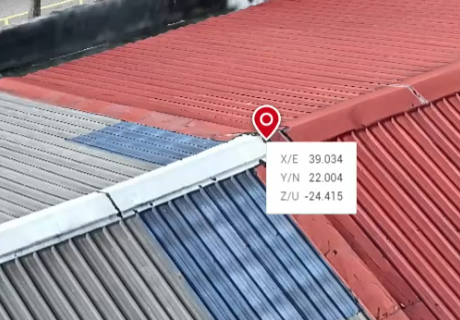
Point Coordinate
For the analysis part, DJI Terra will be used to make analysis of the data. DJI Terra allows users to measure the length of the feature, get the point coordinates, measure area size and also measure volume size.
This sums up the process flow of 3D mapping. It would seem like an easy task, but much effort and technical knowledge is required. For more information, please contact us at DronesKaki professional or DJI Academy.